

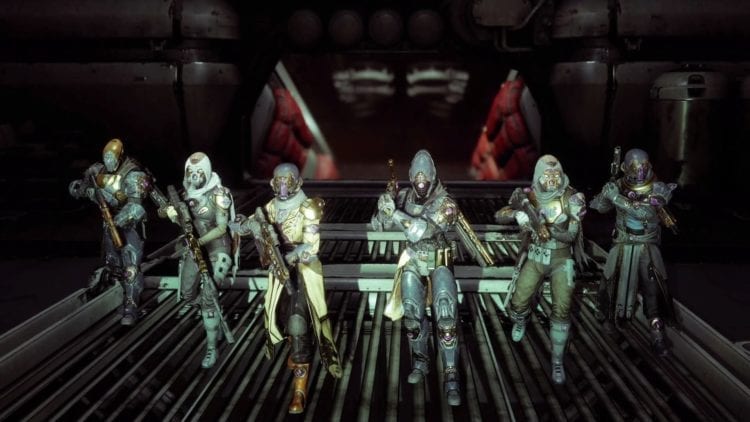
Destiny 2 Season Of Opulence Armor
So you've gotten by the initial quest steps in The Invitation given by Werner 99-40. Now, you're about to get to the fun stuff in Destiny 2: Penumbra. It'due south time to enter the Menagerie and make use of your Chalice of Opulence. Accept annotation that your Chalice of Opulence is account-spring which means your other alts automatically have information technology already. At that place's no need to redo the previous quest steps.
This half-dozen-player action takes place deep in the bowels of the Leviathan, and you'll find new areas and the aforementioned dangerous foes. The Menagerie does have matchmaking for normal mode. Heroic mode, which releases on June 25, will require you to detect a premade fireteam. In any case, here's a quick guide on what you tin detect inside Calus' playground, too equally the bounties you lot tin can do for Werner 99-40.
Dunkin' Orb-nuts
First, brand certain you've unlocked the summit node of your Chalice of Opulence and that you've slotted a rune. Check out Nessus' destinations and yous'll see an icon for the Menagerie right side by side to the Leviathan at the lesser left corner. Go ahead and outset information technology.
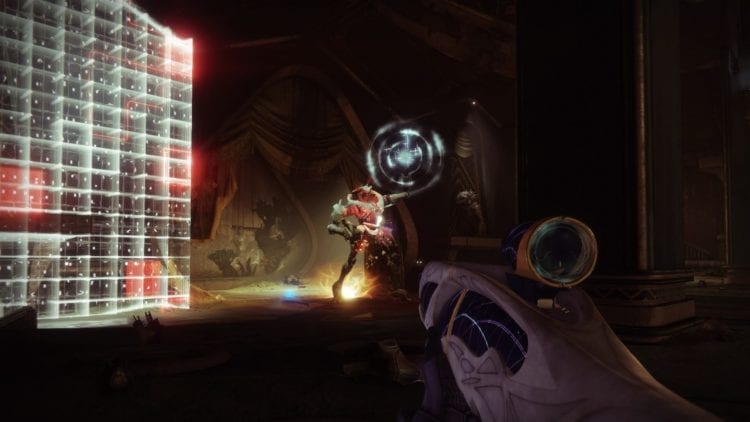
The first part (the Lamplighting) will have quite a number of enemies spawning from doorways. This is non the bodily Menagerie action yet, this is merely a free sense of taste. At regular intervals, ogres volition spawn. Once you lot kill them, they'll also drop a couple of orbs. Pick these up and dunk them on on the pedestals surrounding the middle ring. This will lite upwardly the braziers/pedestals. When you've lit up all the braziers, the Menagerie itself opens upwards.
To consummate the triumph for this part (and earn 500 Imperials), you'll want every fireteam member to light up only i brazier/pedestal each. That ways each actor should pick up and dunk but i orb.

What The Heck Is The Menagerie?
Call up of the Menagerie like Destiny 2's stroll down memory lane. Certain, the aesthetics will remind you of the Leviathan, except that certain areas are drab and have fallen in disrepair. Likewise, thematically, you'll notice how it symbolizes the lost grandeur and splendor of Calus' empire. Information technology is the Season of Opulence, after all.
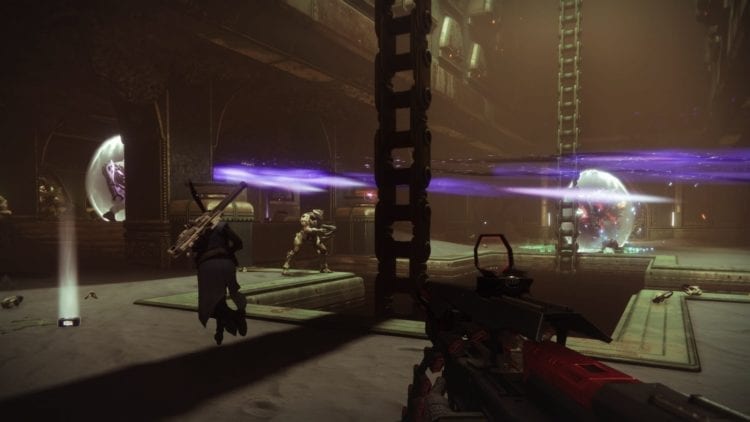
The most telling parts, nevertheless, are the mechanics for each see. There will be a progress bar on the left side of your screen and you'll demand to fill this to the max to face a boss. To exercise this, you'll have to complete various encounters all around the Menagerie. There's no gear up guild and there's no set up limit to how many encounters yous can have, although you accept three minutes to complete each of them. Yous might fail a particular see, but increments will still count towards your overall progress. Oh, and beware because mobs are 720 ability level (PL).
The Menagerie Areas And Encounters
The locations may not be important at the offset, but the clue on the progress bar is. Each encounter will have a particular name and that'd give you a clue near the mechanics, many of which are alike to Destiny 2's "greatest hits." There'due south a mishmash of "orb dunking" or "plate forming," mixed in with various enemy types and quirks. Once again, you have iii minutes to complete the encounters.
Here are the mechanics for each activity that I've found then far:
- The Riposte – Several sword knights volition spawn. Kill them and yous'll obtain their sword relics. Pick up the sword and keep attacking the shielded knights to choice up more than swords. Shielded ogres will also appear and so employ the swords from the knights to interruption their shields and kill them.
- The Crystals – There are roughly a dozen purple crystals in the room and they are all immune. Harpies, minotaurs, and knights will periodically spawn. Killing them volition drop the "elemental skulls" (from Eater of Worlds). Use them to destroy the crystals.
- The Hunted – Stand on the plates until they're fully activated. There will be several melee thrall and exploding thrall running after you. Oh, and there's also a behemothic Darkblade knight wannabe. Activate all the plates to successfully consummate the encounter.
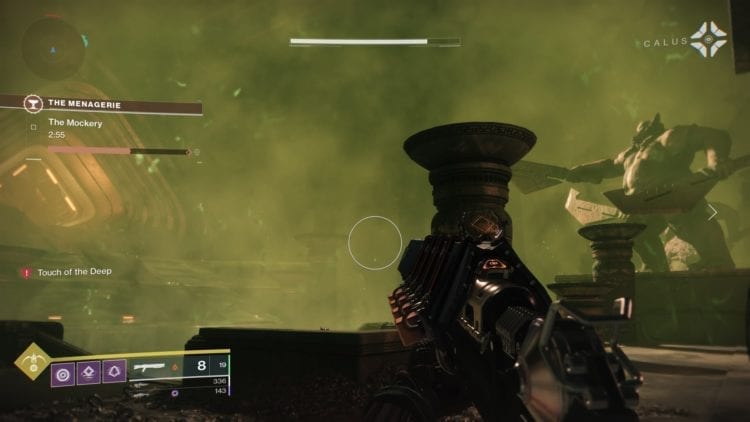
- The Mockery – There are bubbles with a translucent field and going outside of them will drain your health (like the Blind Well). The bubbles will slowly shrink and get destroyed. Kill the wizards so they driblet orb relics. Selection them upward and douse them in the receptacle inside the bubbling to keep them agile. There are three bubbling in the expanse so you need to keep all three active throughout the see.
- The Arkborn – Bubbles will once again be in the room just your wellness won't be drained exterior of their areas. Instead, you'll need to run into the glowing pillars of light, charging yourself, and so dunking on the chimera receptacles.
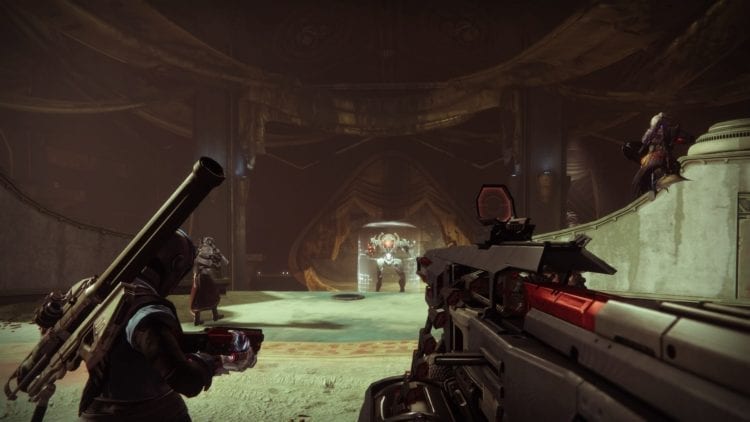
- The Gauntlet – This is similar to the Gauntlet encounter from the Leviathan raid. After killing enemies, including any large fellas in the centre of the loonshit, you lot're automatically teleported to the side bedchamber which is when yous'll starting time running. Go far through the hoops to become to the finish to gain extra points. When you lot get teleported for the second and third fourth dimension, at that place volition be flame traps as well which will instantly kill y'all so endeavor to avoid them while running. Y'all can cheese the Gauntlet come across by making it to the end line. Instead of running past information technology, fire off your projectile weapons (Yard Voices, Telesto, grenade launchers) through the stop line first. These shots would count as players completing the run.
For every meet, you'll desire to pay attention whenever a prompt notifies you that "Calus wants y'all to challenge stronger foes. It means a tougher enemy (often an ogre or a giant minotaur) will end up spawning. These are, technically, the "mini phases" of each encounter. Killing all of these giant enemies volition let you cease the encounters successfully.
The Menagerie Dominate: Hasapiko
No thing how many encounters you need to do to complete the progress bar, eventually you lot'll find yourself facing off against the concluding dominate. Information technology'due south Hasapiko, a giant Vex minotaur. Note: I'g not sure if bosses volition modify each week.
Hasapiko is shielded and information technology stays at the dorsum of the room simply blasting you with its cannons. It volition periodically summon yellow bar harpies and other Vex mobs. Killing the harpy majors will have them drop a Vex well granting you a buff. When y'all have this buff, shoot Hasapiko until its shield is destroyed, and then go along nuking information technology with supers and bullets.
When Hasapiko is not shielded (and while you're DPSing), information technology will create Vex forcefields or walls that will move towards your area. These will kill y'all if you so much as bear upon them. Think of the start Resident Evil motion-picture show or that trap from Cube. And then, yes, while you're doing harm to Hasapiko, you'll have to sidestep these techno-walls. Your bullets, grenades, and supers will still hit Hasapiko through these walls. Oh, and when its health is low, it'll summon two walls instead of one.
When Hasapiko is downed, yous can finally open the treasure chest. If this is your first time doing the Menagerie, then you'll also go a triumph that can exist completed, granting yous the adjacent step of the quest.
From hither, yous'll demand to head back to Werner 99-forty on Nessus. Open whatsoever of the chests at the ship's stern (back) and yous'll complete Destiny 2's The Invitation quest line for Season of Opulence.
Beaker Of Opulence Customization
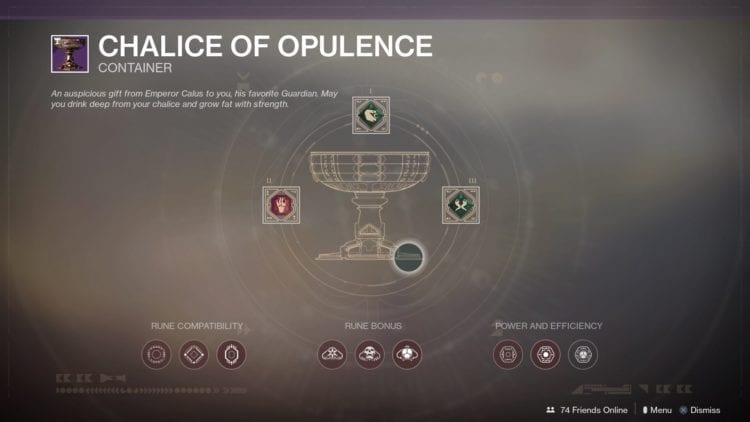
In order to power upward your Chalice of Opulence, you'll need to consummate a few more Menagerie activities while as well gathering runes and Imperials (currency) to actuate more nodes or bonuses. Just showtime, we'll need to understand how the Chalice of Opulence works.
At that place are iii master slots. Just the topmost slot is unlocked during The Invitation quest line. The rest will require more Imperials.
- Top (Gear Type slot) – determines the type of armor/weapon you'll receive from the Menagerie's final chest
- Left (Gear Specialization slot) – determines the properties of that item
- Right (Masterworks slot) – determines the type of masterwork for that item
The Chalice of Opulence besides has perks that you tin unlock and all of these cost Imperials every bit well.
Rune Compatibility:
- Level 1 – allows slotting of red runes that guarantee an arm or leg armor
- Level 2 – allows slotting of greenish runes that can guarantee a helmet, hand cannon, or sidearm
- Level 3 – allows slotting of blue runes that can guarantee a chest armor, fusion rifle, or shotgun
- Note: By default (at least from your outset rune) you'll only be able to get form items.
Rune Bonus:
- Level 1 – additional runes from Werner 99-forty's bounties and consumables
- Level ii – one actively slotted rune in the Chalice is refunded
- Level three – receive an boosted not-powerful advantage from the Menagerie'southward last chest
Power and Efficiency:
- Level one – an additional powerful reward from the concluding chest in the Menagerie; unlock treasure chests on Werner 99-twoscore'south barge on Nessus
- Level two – an boosted powerful reward from the final chest in the Menagerie; Destiny ii playlist activities (such as strikes, crucible, or gambit) advantage imperial currency
- Level 3 – weekly powerful rewards also drop Season of Opulence mods
What you lot'll want to do early on is get Power & Efficiency level i and 2. Non only will this perk line requite you two actress powerful drops, it will internet yous some Imperials rarely when doing playlist activities. You can likewise purchase an extra consumable from Werner 99-40 to gain a huge corporeality of Imperials when doing Destiny 2 playlist activities (upwards to a maximum of three per week for your account).
Later, once you've amassed plenty Imperials and runes, unlock the remaining slots and perks. This volition permit you to "fine-melody" the Chalice of Opulence, customizing it to go the type of reward that you need. Let's say you demand a PL boost for your leg armor, so y'all'll want to slot a rune that'll guarantee that as a reward.
Chalice Of Opulence: List Of Runes
Credits go to Reddit users JPDeathblade and Windzer408 who've provided lists of the Chalice of Opulence runes and the results of combinations. Remember, you tin only receive additional rune types/colors in one case yous've unlocked their corresponding perks. Rune I corresponds to the top slot of your Chalice of Opulence, whereas Rune II corresponds to the slot on the left side.
Chalice of Opulence/The Menagerie armor drops:

Beaker of Opulence/The Menagerie weapon drops:

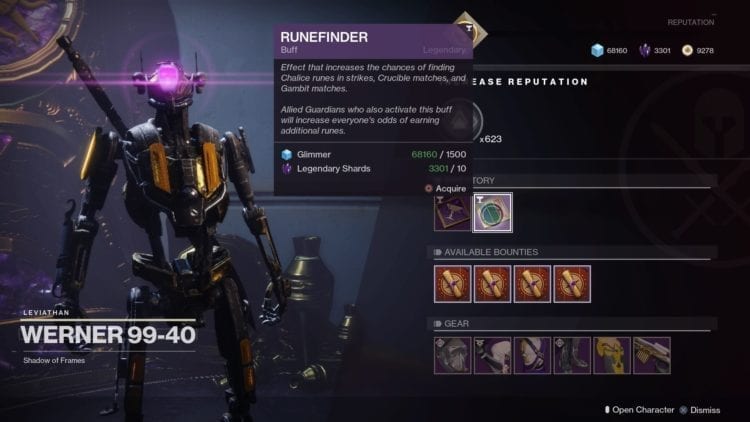
Werner Bounties And Imperials
So where exactly practice we find more of these runes and Imperials to unlock all those slots and perks? Well, there'southward Werner 99-twoscore. He will take the following weekly bounties:
- gain experience points via activities or bounties
- consummate 10 vanguard bounties
- become 200 sidearm, shotgun, submachine gun, or sword kills at close range
- loot five legendary engrams that drop on the ground; finest matterwave (masterwork cores) obviously count
All of Werner'due south bounties volition requite powerful rewards, as well every bit a rune and some Imperials. But, Werner won't requite them to you directly. For each bounty you complete, you likewise go a treasure map. The locations are marked on your map then you lot won't get lost.
You'll find your reward once you open up the chest in those locations. Also, one time yous've completed all four of Werner'due south bounties, you tin visit Benedict in the Tower and he will accept another powerful gear reward for you.
Every Destiny two playlist activity will grant y'all runes and Werner also has consumables that will allow you proceeds extras. The more than Guardians that accept this event active, the more runes you can go at the end of each activity. Think of it as an actress fireteam medallion for Penumbra and Flavour of Opulence, except these are for runes and non for experience points.
Finally, bank check your triumphs page. Completing certain triumphs will besides internet you a large corporeality of Imperials and so you lot can upgrade your Chalice of Opulence.
Week ii Update
Werner 99-40'southward new bounties this week are:
- get 150 precision kills
- collect 100 orbs of light
- complete ten Crucible daily bounties
- decrypt 3 prime number engrams
All of these can be done as you do your Destiny 2 milestones for the week. For the prime engrams compensation, exotics that drib in the wild do non count. They demand to be legendary prime number engrams instead that are decrypted via the Cryptarch. Since prime engrams are tied to the quantity (and quality) of enemies yous kill, then activities that net y'all the most kills will be helpful (ie. Blind Well, Escalation Protocol, Menagerie, and every raid).
During the outset week, Werner required 10 Vanguard daily bounties and at present he requires 10 Crucible daily bounties. In that location'due south a good take chances he'll crave Gambit bounties side by side week so be sure to stock upwardly on completed ones prior to the reset.
The Menagerie: The All-time Classes And The Breast Glitch Farm
Once you've obtained more than runes and unlocked more slots for your Chalice of Opulence, you tin can continue farming the Menagerie to your heart's content. There likewise seems to be a trick as noted by Reddit user Pill_Dickle_RS. Afterward receiving your reward from the chest, you can go through the doorway behind information technology. Follow the corridor as it loops effectually until you see "The Menagerie" pop upward on the lower left side of your screen — this ways you've changed zones.
Open your pursuits tab quickly and then your Chalice of Opulence. Slot a new rune and make your manner dorsum to the chest. Voila! You'll get a new reward. Keep going dorsum and along, slotting a new rune each time, to get the drops that yous desire. If you're fast, you can go four or 5 extra drops in one Menagerie run. These tin include the following:
- guns or armor pieces with curated rolls/fully-masterworked
- guns or armor pieces with mods or masterwork upgrades (can be dismantled for those mods or masterwork cores)
- 500 Imperials – these seem to accept a 25 to 30 percent driblet chance whenever you open the Menagerie chest
As for the classes, given that a majority of players running Menagerie in the first week volition still be beneath 720 PL, you're going to demand the following:
- Warlocks (lots of Warlocks) – having a Warlock with Well of Radiance and several with Nova Bomb (while wearing Skull of Dire Ahamkara) would be amazing for several Menagerie encounters
- Hunters – those using Blade Barrage (with Shards of Galanor) or tether (Orpheus Rigs) would likewise be invaluable
- Titans – you can utilize your alts
We'll go along this guide updated in the coming days as we discover more than runes and peachy Beaker of Opulence combinations. Who knows? Perhaps Werner might have something extra every weekly reset? Don't forget to bank check our Destiny 2: Penumbra and Season of Opulence guide and features hub as well.
Source: https://dev-wp.pcinvasion.com/destiny-2-season-of-opulence-the-menagerie-guide/
0 Response to "Destiny 2 Season Of Opulence Armor"
Post a Comment